Let's get started!
This post focuses on how to start a project, manage a clean working directory, and properly set up a script.
What is a project?
A project is a great way to keep all your different coding projects organized. Each project has its own working directory, workspace, history, and documents.
Here is how you create a project:
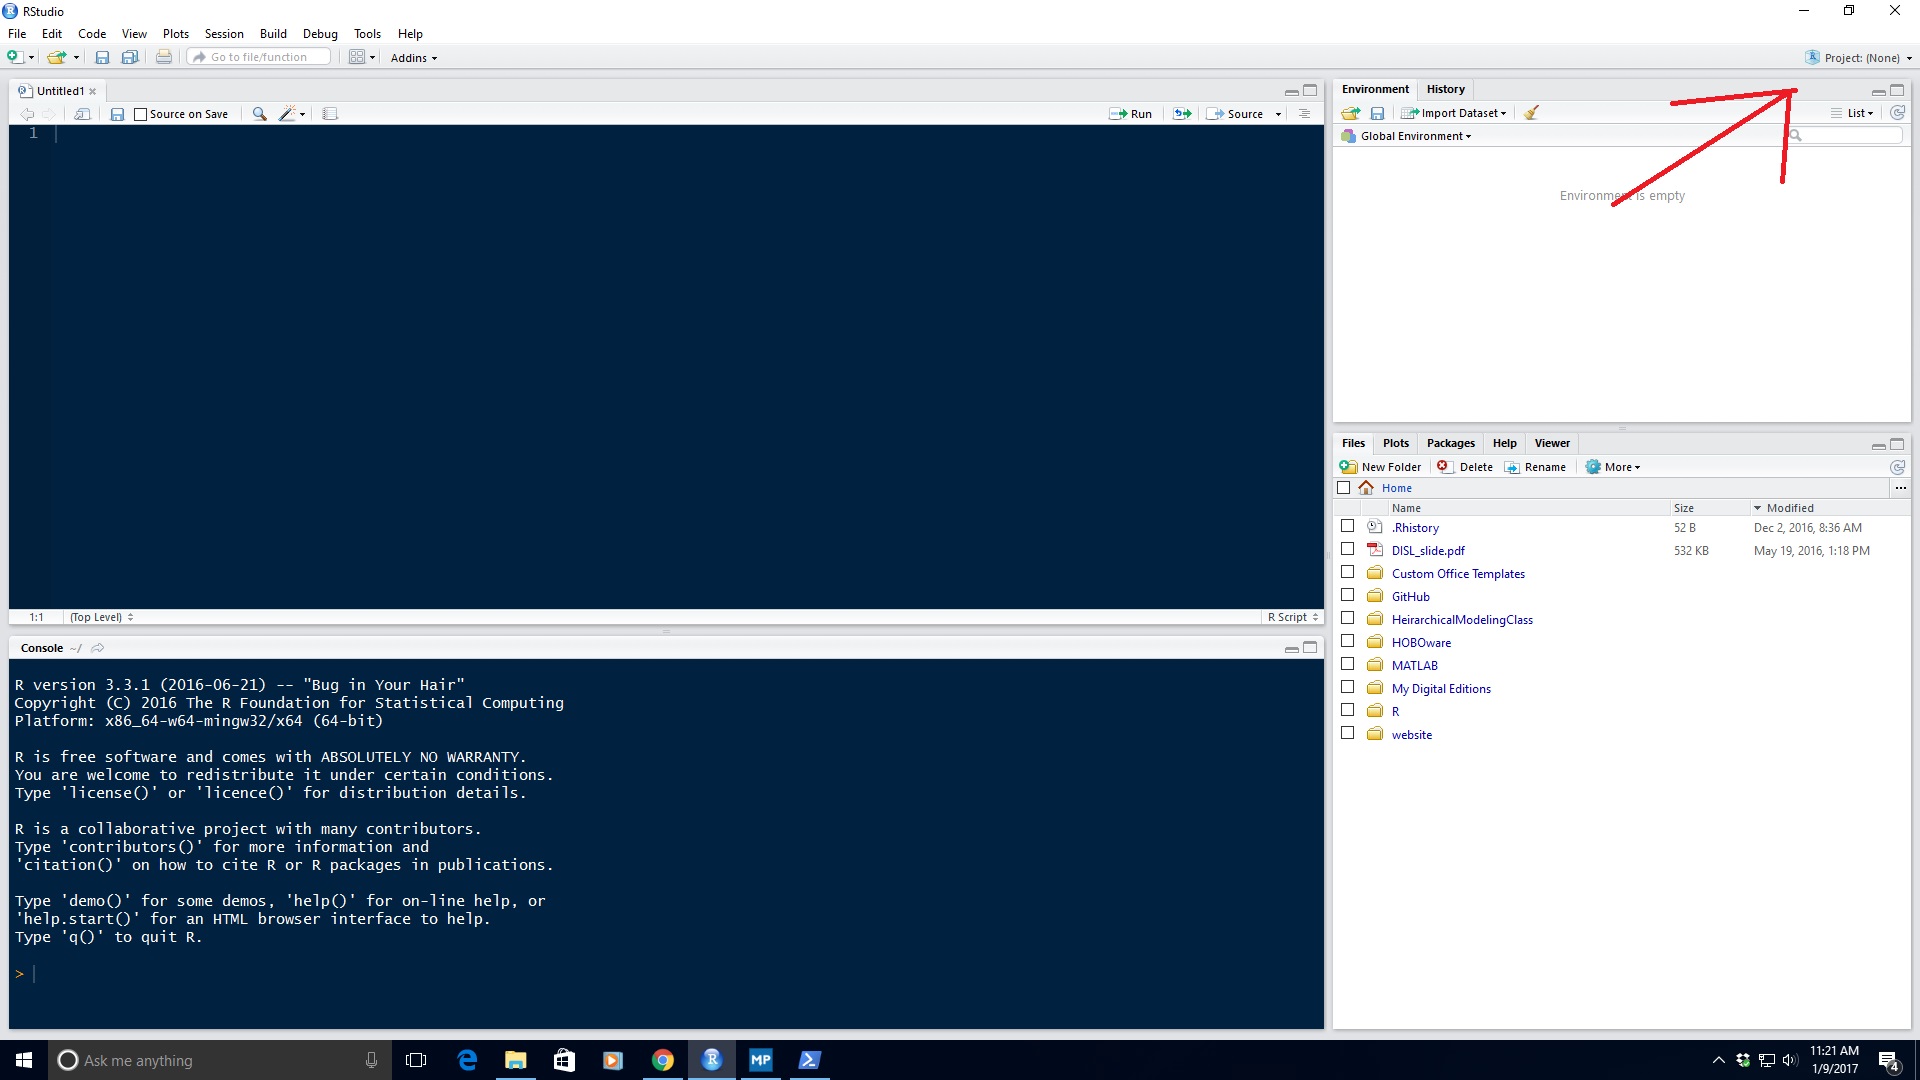
1) Open R Studio
2) Notice the Projects icon in the right hand corner
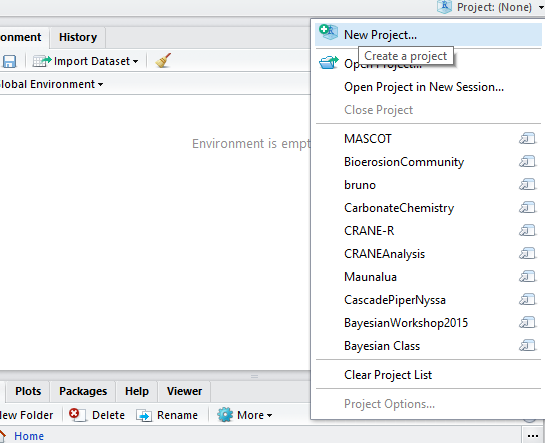
3) Click on the drop down menu and then click on New Project…
Notice how I have a bunch of random names (i.e. MASCOT, BioerosionCommunity, CarbonateChemistry). These are the names of my current projects.
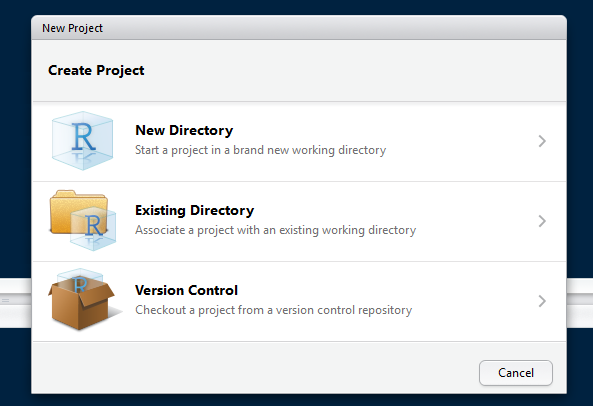
4) Once you click New Project…, you will be directed to this interface. Click New Directory. Note this will create a project in your default working directory. If you want to put your project in a different directory like dropbox, my documents, or your local GitHub folder, then click Existing Directory and navigate to where you want.
5) Next, click on Empty Project
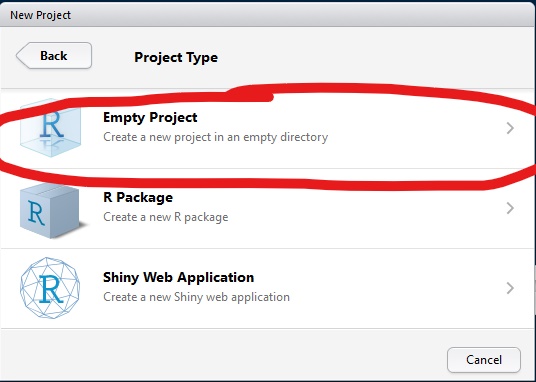
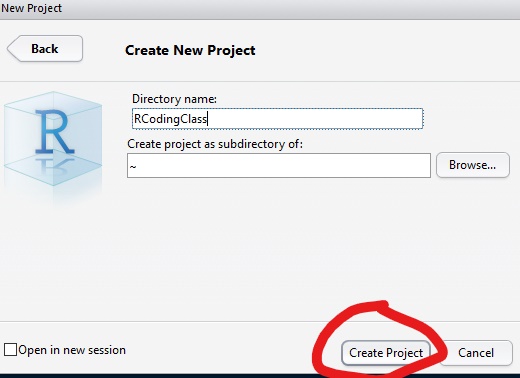
6) Then name your project whatever you would like (I named this one RCodingClass) and click Create Project.
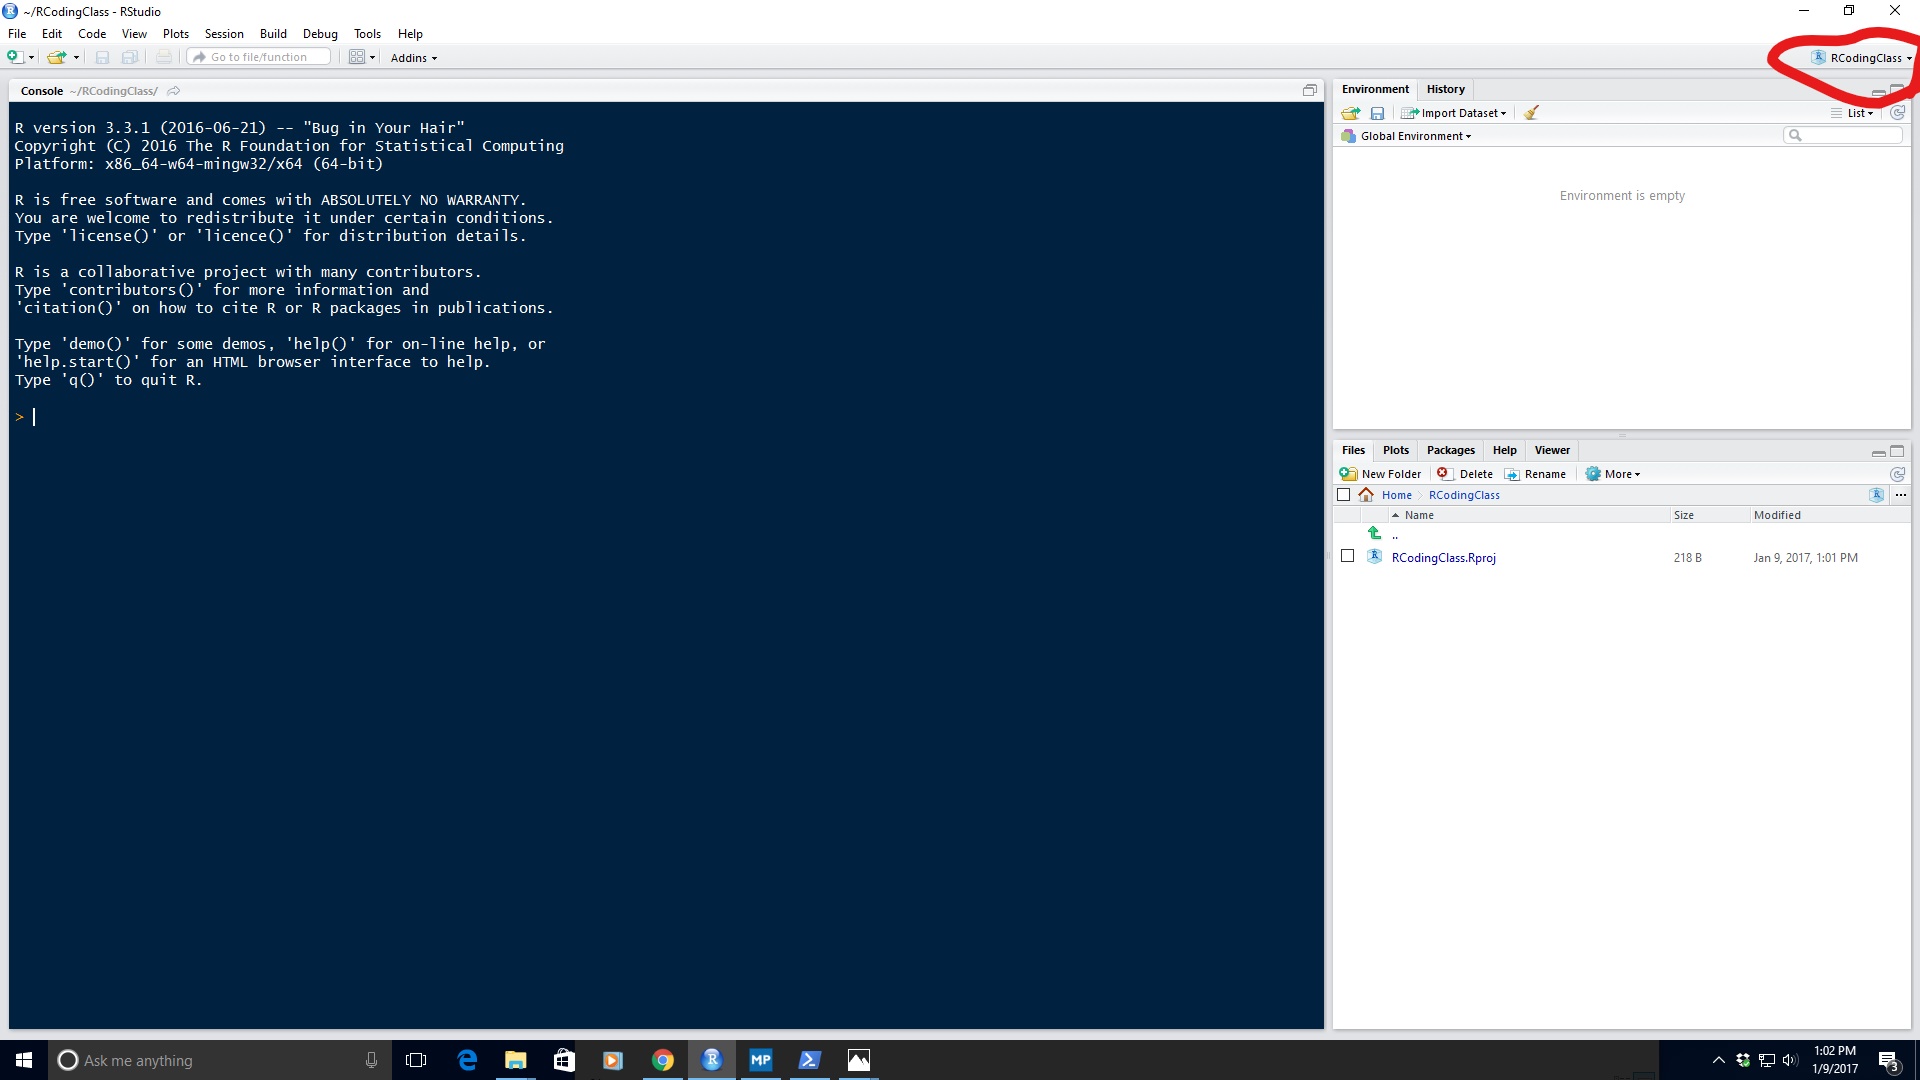
7) You will now be directed to your new project directory and you will notice that it now says RCodingClass in the top right-hand corner.
8) Now, when you click on the drop down menu, you will not notice that RCodingClass has been added to the list of projects.
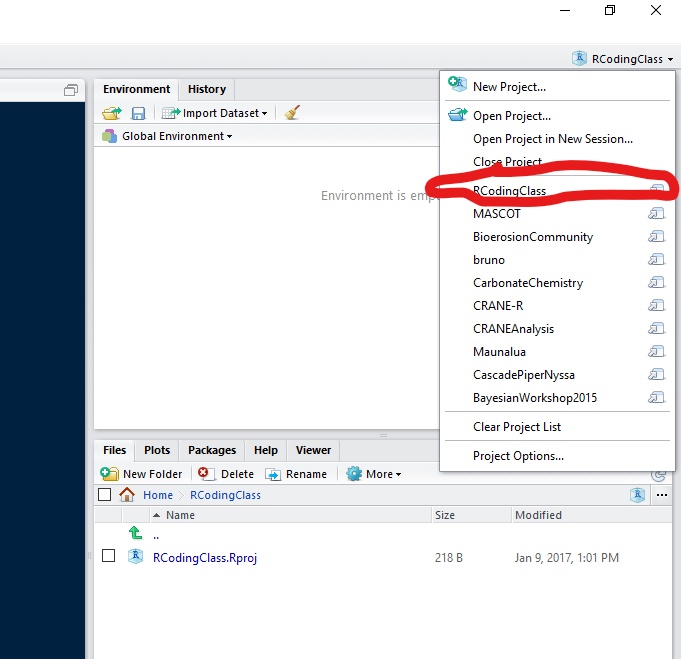
9) When you have multiple projects, you can click on the project name to navigate between each and pick up right where you left off.
Setting up your working directory
There is nothing worse than having a messy working directory. One of the major benefits of coding is to create transparent and reproducible research. Having a messy directory makes it difficult for outsiders to follow your code/data.
For example, here is what not to do.
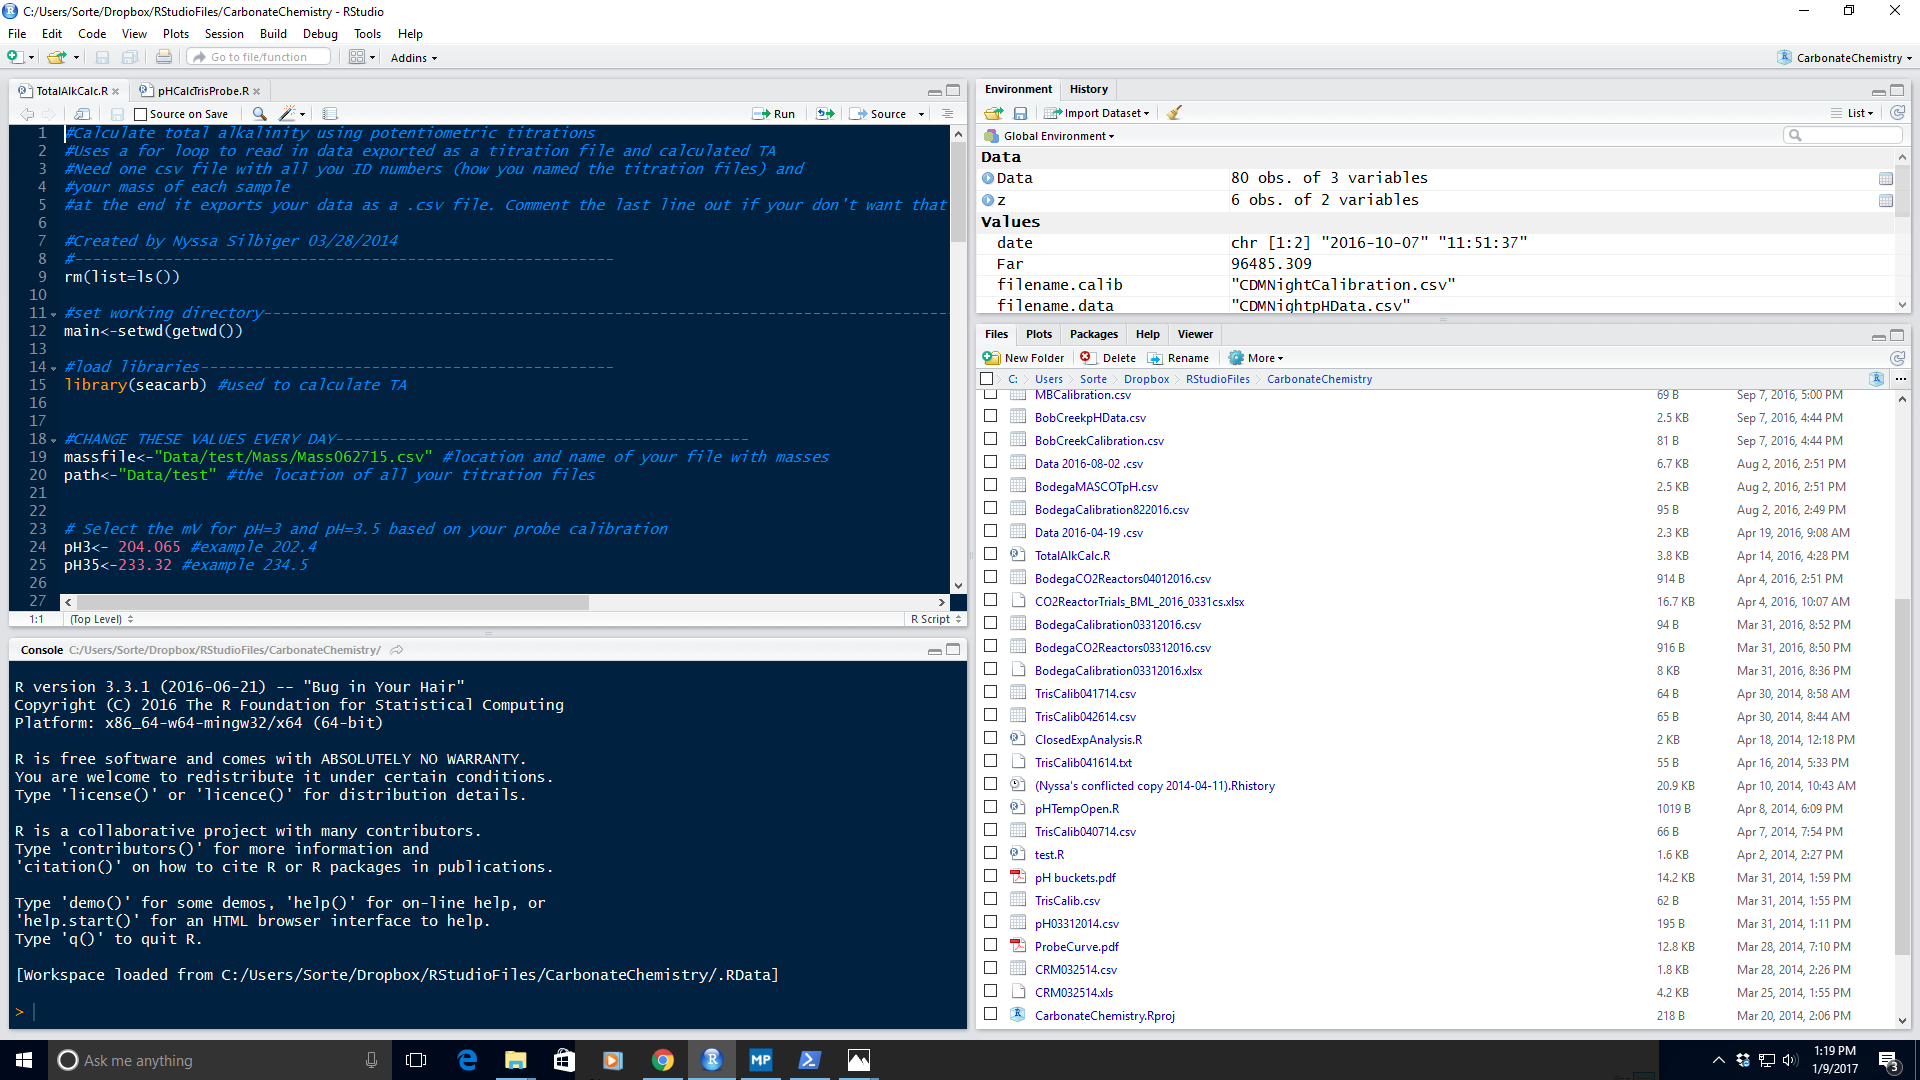
Ah! My eyes! You can see that I have all sorts of data files, script files, and images all in the same folder and unless you are me, you can not tell what is what. So, let’s set-up our new RCodingClass project so that it does not look like a crazy jumble.
I typically create a minimum of two subfolders in my project directory: one for all my data files (e.g., .csv, etc.) and one for my output files (e.g., saved images). If I am writing a lot of functions, I will sometimes also have a subfolder for my functions and source them into my script. Some people like to also have a subfolder for all of their scripts, but that is personal preference and we will touch more on that later.
A clean working directory looks something like this:
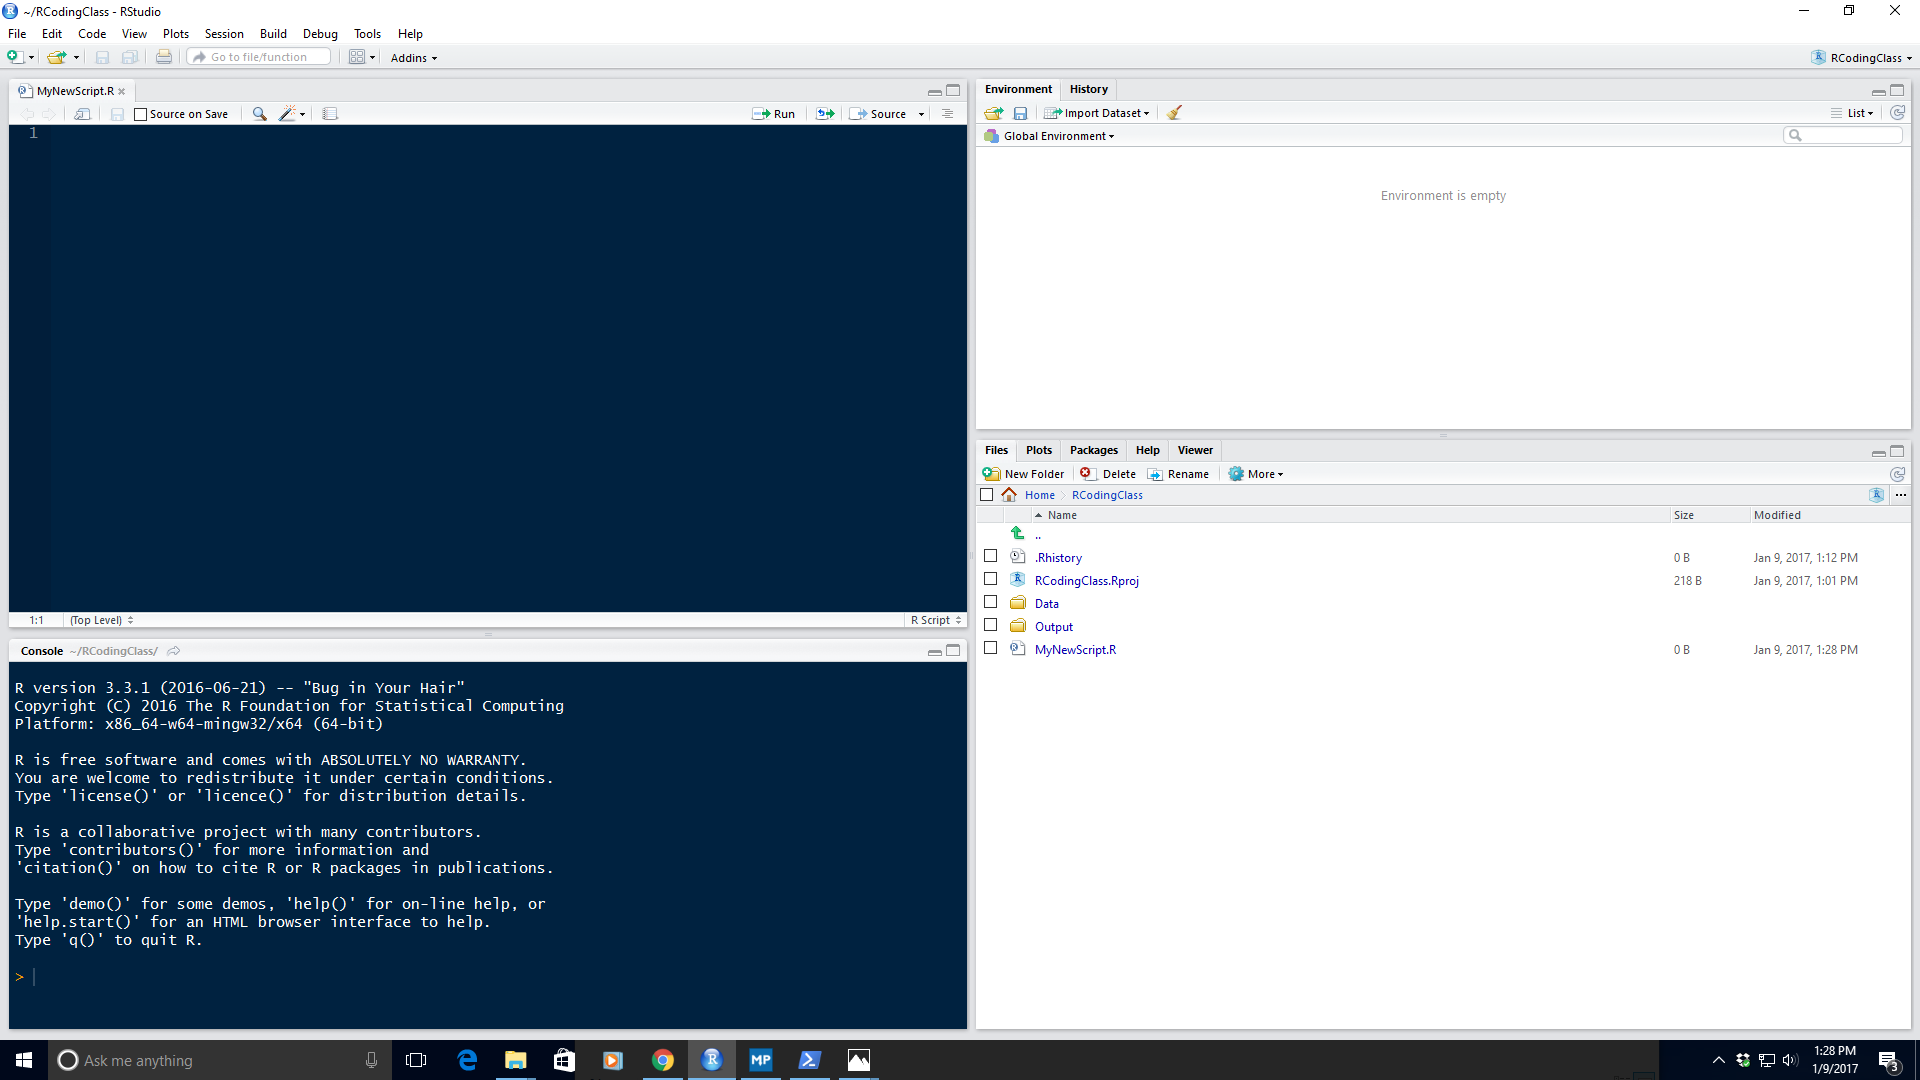
Much better… Now it is time to set-up your script
Set-up your first script
New coders tend to start their code right away with no comments or explanations of what they are doing. But, again, we want to produce transparent and reproducible research. There have been times where I set-up a script poorly and had to go back to it after a year to re-analyze some data (reviewers are always asking to change analyses, aren’t they… ;) ). I, the creator of the code, could not figure out for the life of me what I did. It was a painful few days trying to remember why I was doing what I was doing; it definitely could have been avoided by using proper coding etiquette.
This lesson, I am just going to show you what a properly set-up script looks like. Over the next few weeks we will discuss these different sections in more detail.
Below, I have divided my script up into 7 different sections:
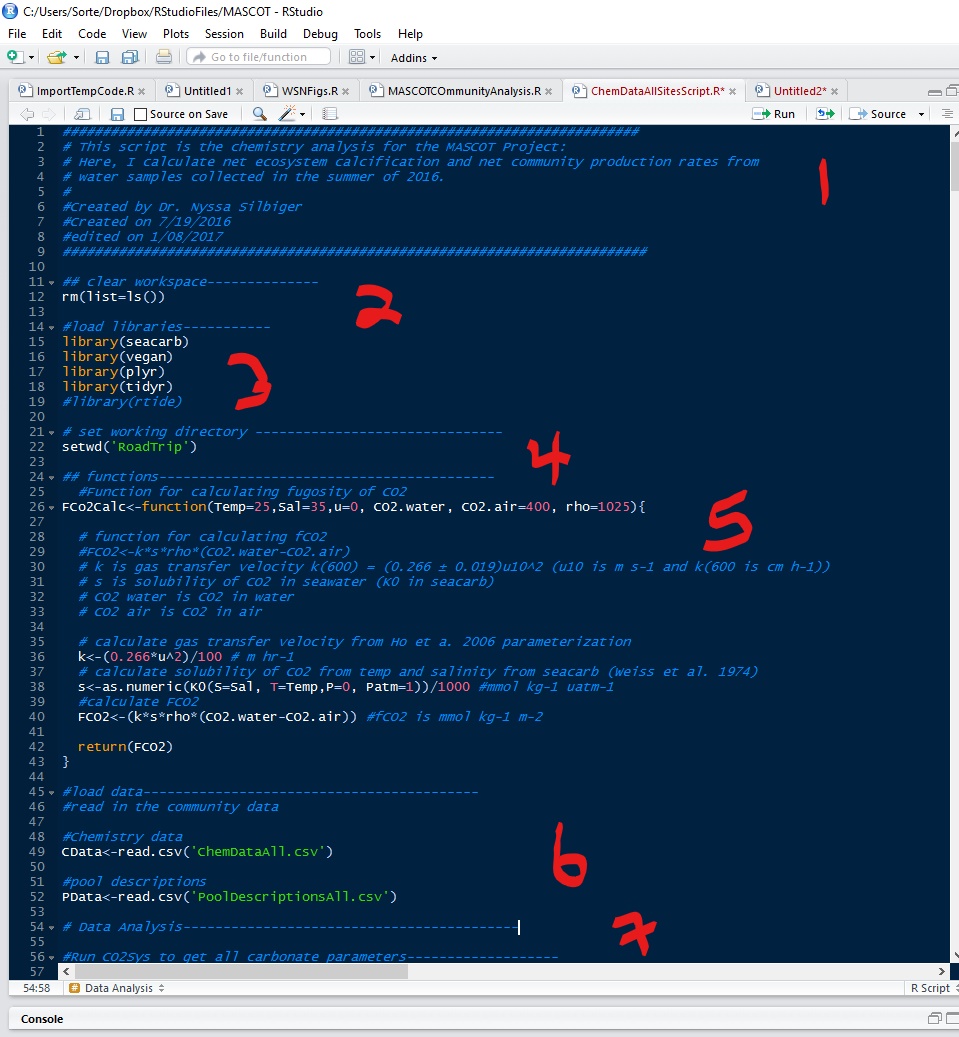
Section 1: Start with a short intro of what your intend to do with your script. Say who you are, the date you created it, and when you last edited it.
Section 2: Clear the workspace. This section removes everything from your environment. People have different opinions on this. I always like start with a clean slate so that variables from prior R sessions don’t conflict my my new session.
Section 3: Load the libraries. Here, I load all the libraries that I need for my code to run.
Section 4: Set your working directory. Luckily, with projects, you will be sent straight to your project working directory. But, if you have created a sub-directory, like I did here, you will need to navigate to that folder.
Section 5: Functions. If you will be creating your own functions it is best to put them all right up front so that they are available for the whole script. If I have lots of functions, sometimes I will put them in their own script and then source them in so that it is not so messy. More on that later.
Section 6: Load data. This is where you load all your data files.
Section 7 and beyond: All your analyses, which can also be subset into different sections.
Probably the most important advice that I can give you is to comment, comment, comment, and comment some more on your code. You can never give too many details, but you can definitely give too little.
For example, look at section 5 where I wrote a function to calculate the fugosity of CO2 in seawater. I listed all the parameters and what they mean, I commented all the formulas and the units that the output should be in, and I also listed the citation for where the formula came from. This way, if you share the code with a colleague, they can see what you are trying to do and where it came from, and maybe find any errors.
OK, now your turn!